How to get started with Marima Manager
Start by creating your manager account, then list vacant units for tenants to discover. Listing is free. When you need full property management features such as tenants, rent records, invoices, payments, and maintenance requests, you can upgrade to a Manager package.

Download the App
Download the Marima Manager App from the Play Store or open the web manager portal. This is where you create your account, add properties, list vacant units, and manage rental activity.
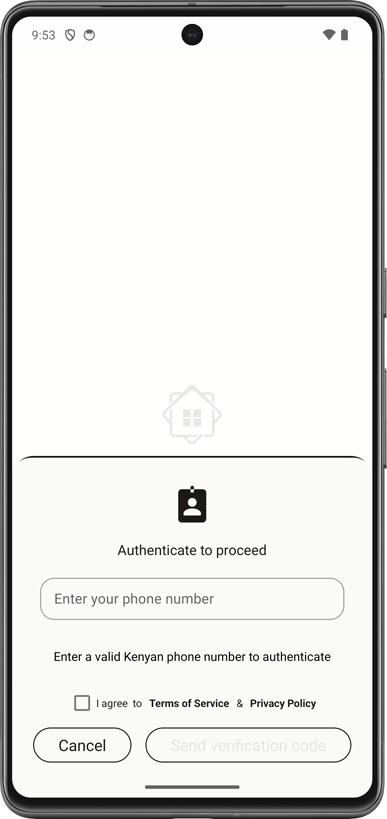
Authenticate with Your Kenyan Phone Number
Authenticate using a valid Kenyan phone number. A verification code will be sent by SMS, so make sure the line is active and able to receive service or promotional messages.
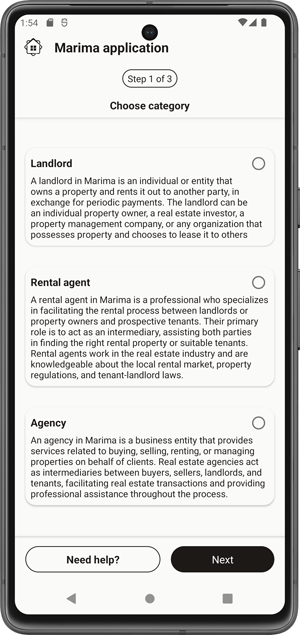
Create Your Manager Profile
Select your manager category, such as landlord, caretaker, real estate agent, or property management agency. Add your basic details and submit your profile. Verification helps protect tenants and keeps listings trustworthy.
Once your manager profile is ready, you can start adding properties and listing vacant units. Tenants using Marima can discover your available units, view photos and location details, and contact you directly. Full management features are available on Manager packages.
Free Listing
List vacant units for free so tenants can find, compare, and contact you directly.
Manager Packages
Upgrade when you need tenant records, rent tracking, invoices, payments, and maintenance tools.
Direct Tenant Enquiries
Tenants can view your units, see photos and location details, then reach out through available contact options.
How to add a property!
Add your property once, then attach vacant units to it. Accurate location, clear photos, correct rental details, and updated availability help tenants trust your listing and contact you faster.
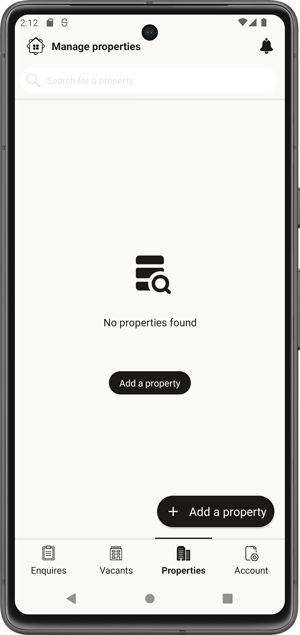
Access the Property Section
Open the Property section and tap the "Add a property" button. This starts the property setup process before you add individual rental units.
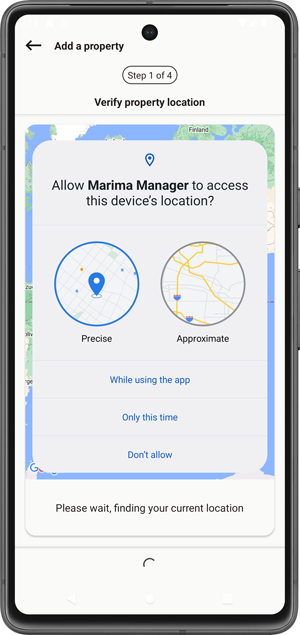
Grant Location Permission
Allow location access while you are physically at the property. Marima uses GPS to place the property in the correct area so tenants can search rentals near them.
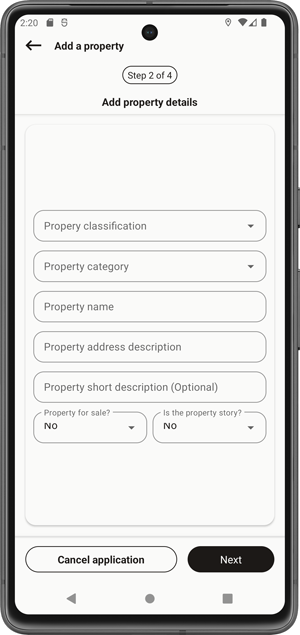
Enter Basic Property Details
Enter the property classification, category, name, address, and description. Use clear details that help tenants understand the property before they contact you.
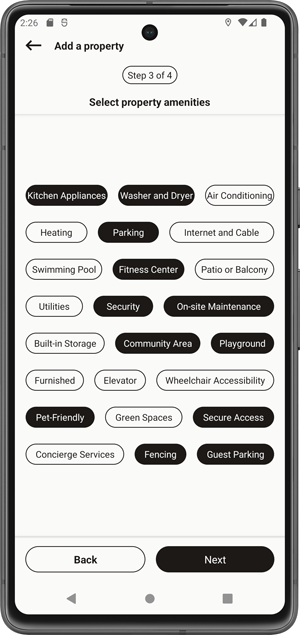
Select Amenities
Choose from a list of amenities available at the property. This helps potential tenants understand the features and benefits of the property. Select the amenities that best represent the property's offerings.
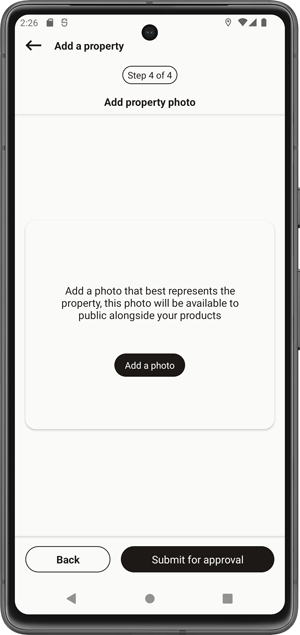
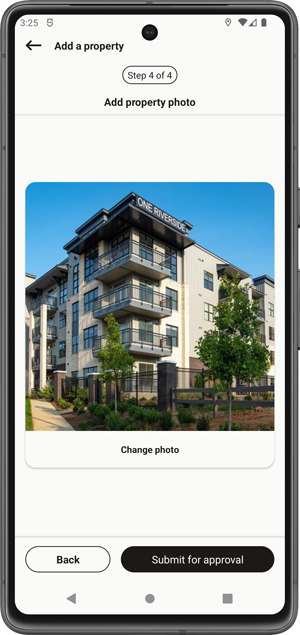
Add a Representative Photo
Upload a high-quality photo that best represents the property. A visually appealing image can significantly impact a tenant's decision to inquire about the property.
Submit for Approval
After providing all necessary information, submit the property for approval. This verification step ensures that the property genuinely exists and belongs to your account, enhancing trust and preventing potential tenant scams.
How to edit and manage a property!
These four steps allow you to efficiently manage your properties, ensuring that property details, amenities, and availability status are up-to-date and accurately reflect the property's status in the market.
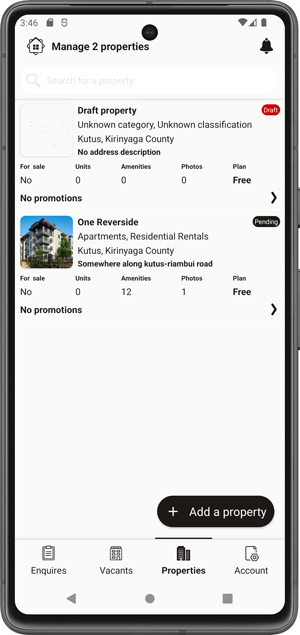
Select the Property
Start by navigating to the Property Listing section within the app. Here, you'll find a list of your properties. Select the specific property you wish to manage.
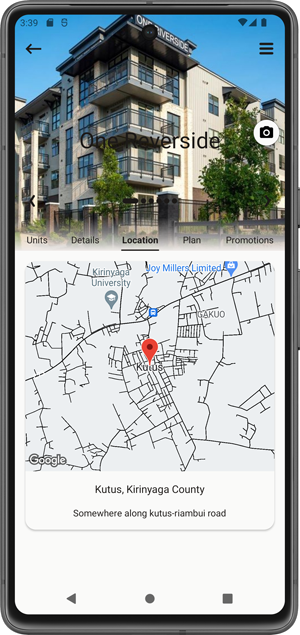
Access the Property Menu
On the property page, where property details and units are listed, look for the menu icon (three horizontal lines) located in the top-right corner. Click on this icon to access property management options.
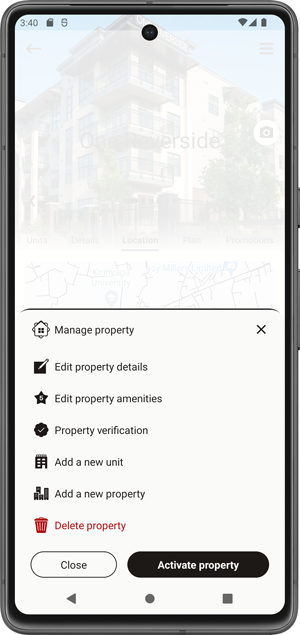
Edit Property Details and Amenities
Within the menu dialog, you'll find options to edit both property details and amenities. Click on 'Edit Property Details or Edit Property Amenities' to make changes to property-specific information and manage amenities.
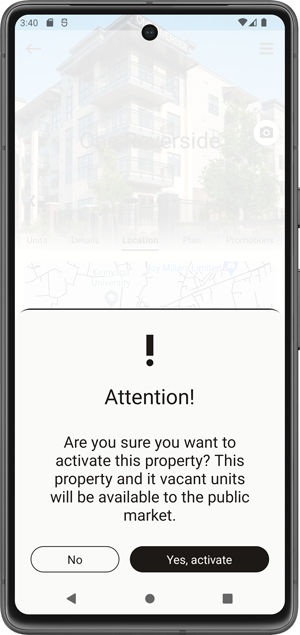
Activate or Disable the Property
In the same menu dialog, you'll also find the option to activate or disable the property based on its availability in the market. Activating indicates it's ready for tenants to discover, while disabling means it's temporarily unavailable.
To showcase your property at its best, you can easily upload up to six images, depending on your subscribed plan. On the property details page, you'll find a visual indicator showing the position of the image you've selected out of the allotted six. Simply click on the camera icon, and you'll have the option to either capture a new picture using your device's camera or select an image from your files. Once chosen, the selected photo seamlessly updates, allowing you to present your property in its full glory to potential tenants.
How to add a unit to a property!
Units are what tenants search for. Add each available bedsitter, single room, apartment, shop, office, or rental space under the correct property, then keep its pricing and availability updated.
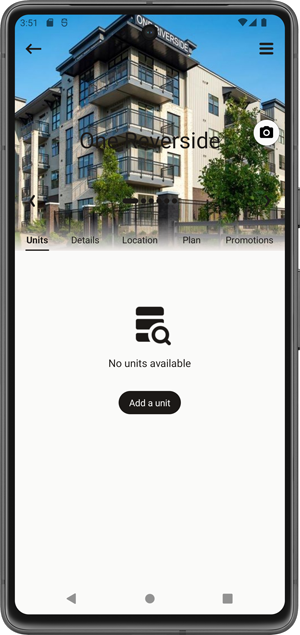
Access the Unit Addition Page
Begin by navigating to the property page where you want to add a unit. Here, you'll find a dedicated tab listing all the units associated with the property. At the bottom of this tab, you'll notice a prominent 'Add a unit' button. Click on this button to initiate the unit creation process.
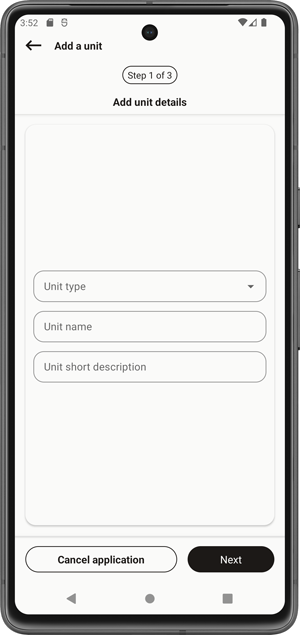
Enter Unit Details
On the unit addition page, the first section is dedicated to entering unit details. Start by specifying the unit type, unit name, and a brief description to help potential tenants understand what makes this unit unique.
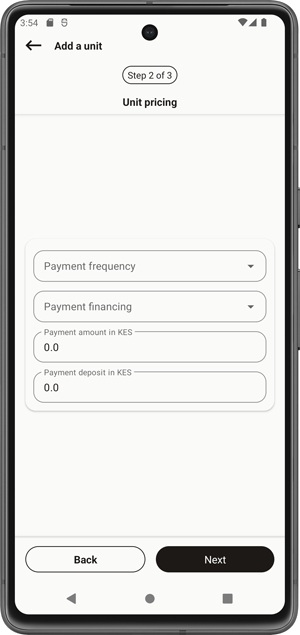
Define Unit Pricing
In the second section, focus on defining the unit's pricing structure. Select the frequency at which rent is paid, whether it's monthly, quarterly, semi-annually, or annually. Next, choose the preferred mode of financing, whether it's full payment or installments. Then, input the rental amount, and if there's a discount for the first payment, you can specify it here.
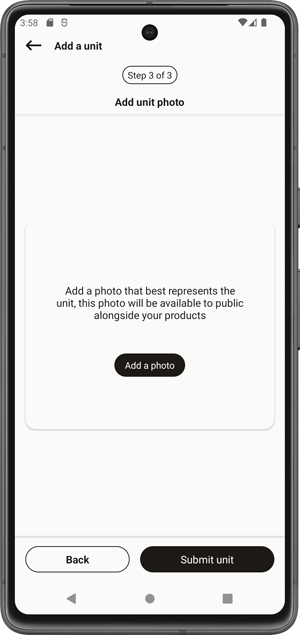
Add a Representative Photo and Submit
Enhance your unit's appeal by attaching a high-quality representative photo. This image provides potential tenants with a visual impression of the unit. After attaching the photo, review all the details for accuracy, and once you're satisfied, click the 'Submit' button. This action saves the unit information and makes it easier for potential tenants to discover and enquire about the available space.
How to edit and manage a unit!
These four steps allow you to efficiently manage your properties, ensuring that property details, amenities, and availability status are up-to-date and accurately reflect the property's status in the market.
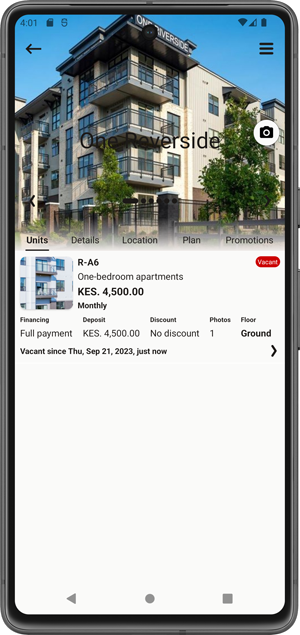
Select the Unit
Begin by navigating to the property details page where all the units are listed. From this listing, choose the specific unit you wish to edit and manage.
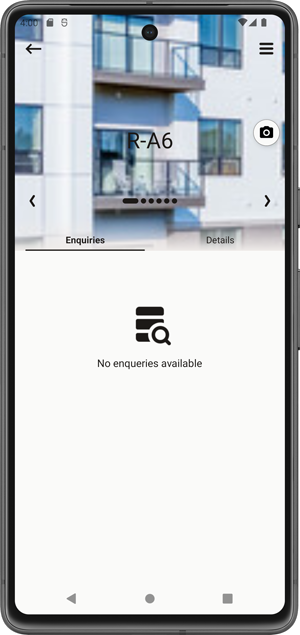
Access the Unit Menu
Once you're on the unit's page, look for the menu icon represented by three horizontal lines, typically located in the top-right corner. Click on this icon to open a menu with various unit management options.
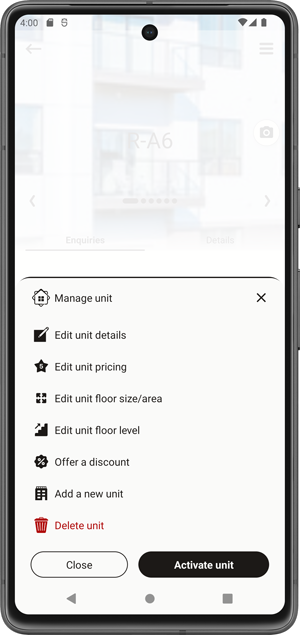
Edit and Manage Unit Details
Within the menu dialog, you can efficiently make changes such as editing unit pricing, floor size or area, floor level (if applicable), offering or removing discounts, and deleting the unit. Review your edits for accuracy.
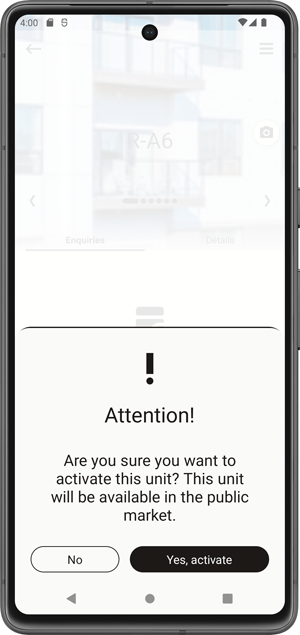
Activate or Disable the Unit
In the same menu dialog, you have the option to control the unit's status. When a unit is active, it indicates that it's vacant and available for tenants. Disabling the unit signifies that it's occupied or temporarily unavailable. Make sure to adjust the status accordingly.
To elevate the presentation of your unit, you can easily upload multiple images based on your subscription plan. On the unit details page, you'll find a visual indicator indicating the position of the image you've chosen out of your plan's limit. By tapping the camera icon, you'll have the flexibility to either capture a new photo using your device's camera or select an image from your files. Once you've made your choice, the selected image seamlessly updates, allowing you to effectively showcase your unit to potential tenants.
Need help setting up your listings?
Our support team can help you create your manager profile, add properties, list vacant units, and choose the right package when you are ready to manage tenants, invoices, payments, and maintenance requests.